How to Add a Flickr Image URL to an Edublogs Post

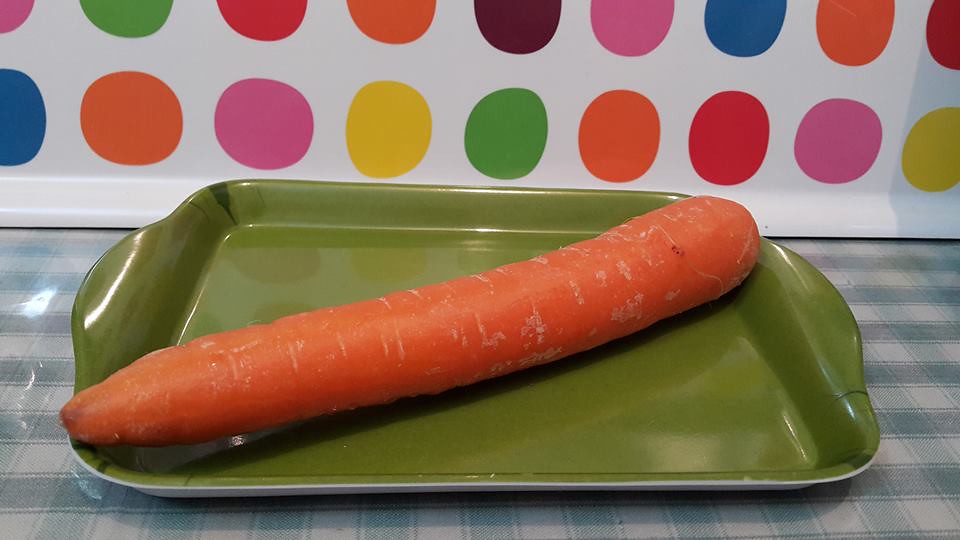
One Carrot” image by Hada Litim on eltpics is licensed under CC BY-NC 2.0

I love using Flickr to post my own pictures. It’s a great resource for storing photos, up to a terabyte of image space for free. I also use others’ Creative Commons pictures, like the one above from eltpics.

Here is a presentation that will help you add Flickr images to your Edublogs website:

For those who know, is this the best way to do this in Edublogs? I know there are many other apps that automatically do the work of citing Creative Commons images in your blog posts.

If you have a favorite CC image resource, will you please share it in the comments below? Thank you!

More information:

Creative Commons – About Creative Commons Licenses, keeping the Internet creative, free, and open.

Flickr.com – Sign up for a free account.

What is Hotlinking? – Why You and Your Students Should Avoid It” – Free Technology for Teachers post by Richard Byrne (@rmbyrne), which suggests you NOT do what I do above because of some good reasons! Mostly I use my own images, but this post gave me some good things to think about before hotlinking to another’s image.

Thanks to Sue Waters (@suewaters) for tweeting me two additional resources for linking to your Flickr pictures.

  1. Embedding Flickr, YouTube, Tweets, Vimeo, and More – This is really easy on Edublogs. I don’t know why I forget about it. Click to learn a great feature of Edublogs.
  2. Sue also shared Compfight, one of those sights I slightly know about that adds the attribution. Here’s how you add it as a plug-in on Edublogs.

That reminded me of another favorite of mine–John Johnston’s Simple CC Flickr Search and the newer version.
Easy Gathering of Student Blog Posts

Blog posts are an important way for students to share a response to what they are learning. When I taught junior high, we wrote many blog posts:

For a year or so, I read students’ blog posts through an RSS reader. I liked that because I could easily tell when someone wrote a random blog post.

However, there were times when a blog post was an assignment, and I wanted to make sure every student turned it in by a certain time. The RSS reader was not as helpful in that situation. When I had given an assignment, my reader feed was always full, and it wasn’t easy to see which posts were from the assignment at hand.

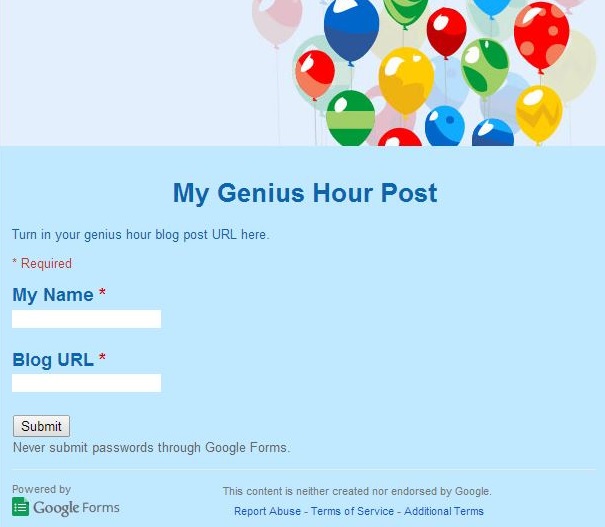
It was then that I discovered I could use a Google Form to collect URLs from their assignment. I would tweet out the link to the form using our class Twitter account, which they would find by going to our @KrebsClass Twitter page–they didn’t need their own account. Students could easily find the tweet on the Twitter page, click on the link to open the Google form, and fill it out simply by writing their name and adding their link to the current blog post assignment. A new form was made for each assignment. (Here’s good help, if you don’t yet know how to get started with Google Forms.)

Here’s an example of one of the forms we used:

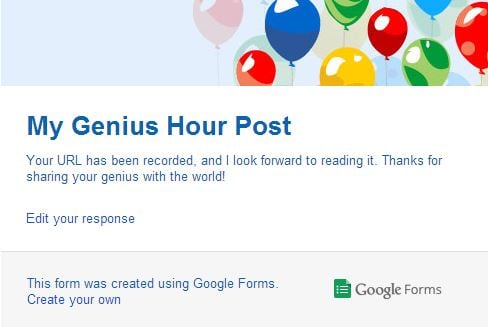
My Genius Hour Blog Post

It’s fun to edit the response students will see after they submit:

Blog Post Response

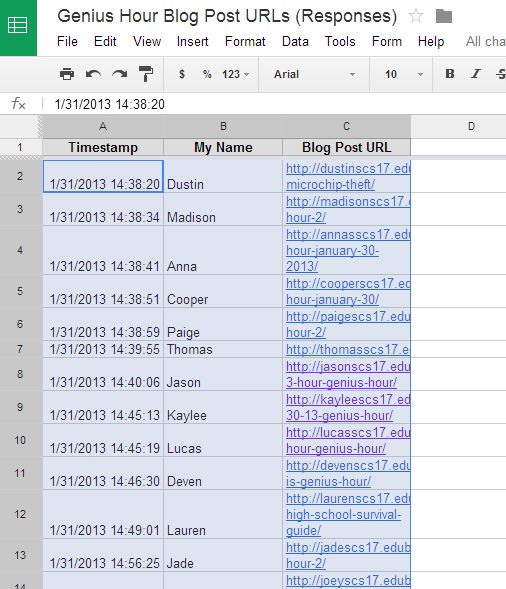
After they all filled out the form, I had the URLs all in one place. It was very helpful to have a clickable list of responses on a spreadsheet. I could read through the assignments so much easier this way!

Please leave a comment and share other ways you use to organize your blog post assignments!

BONUS POST: Read on if you need a little help formatting the spreadsheet from the Google Form.

The default location for the students’ responses in a Google Form is a Google Spreadsheet with the name of your form followed by:  (Responses). When you first see the “Responses” spreadsheet, the columns are all the same size and ordered according to the time stamp. This is fine for seeing what time students turned in their blog post, but I preferred it in alphabetical order to simplify record keeping for me.

So, to format it, highlight all the information in all three columns:

GH Blog Post highlighted

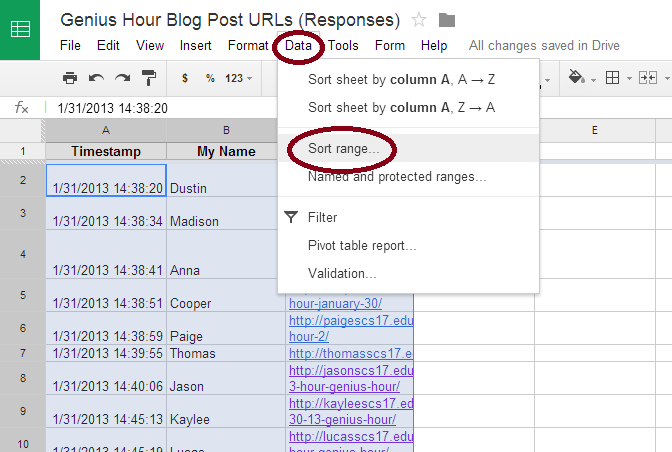
 Next, click on Data and Sort Range.

GH Blog Post Sort Range


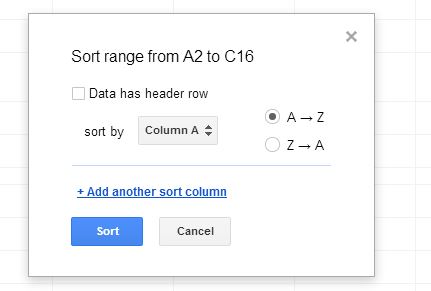
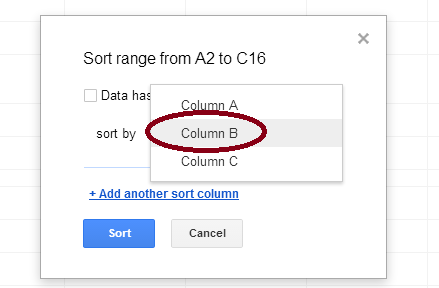
Then click on sort by: Column B (or whatever column you wish to sort):

GH Blog Post sort by Column B

GH Blog Post Column B choice

Now the links are in alphabetical order by student name.

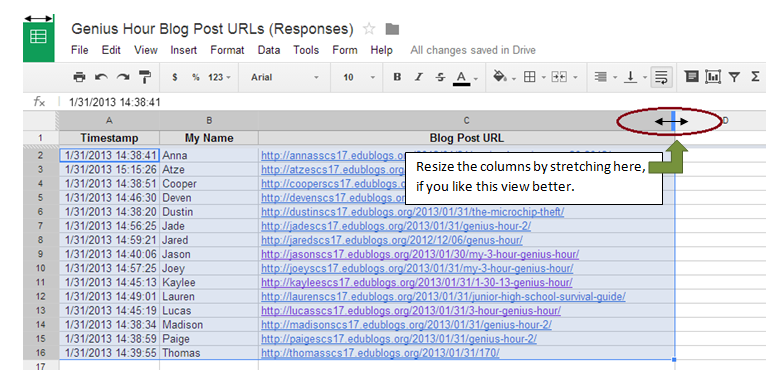
Finally, if you prefer this view, you can stretch out the columns so everything fits nicely.

And voilà, you can easily enjoy your students’ blog posts!

GH Blog Post final

Thanks for reading! I hope something was helpful. As I said above, please leave a comment if you have other ideas for organizing and keeping track of your students’ blog posts.