My Own Genius Hour in the California Desert

I’m having such a great time spending two weeks at my sister’s house. Her place is a dream come true for makers, builders, creators, and artists. Plus, it is beautiful California desert, where I’ve spent much time since my childhood.

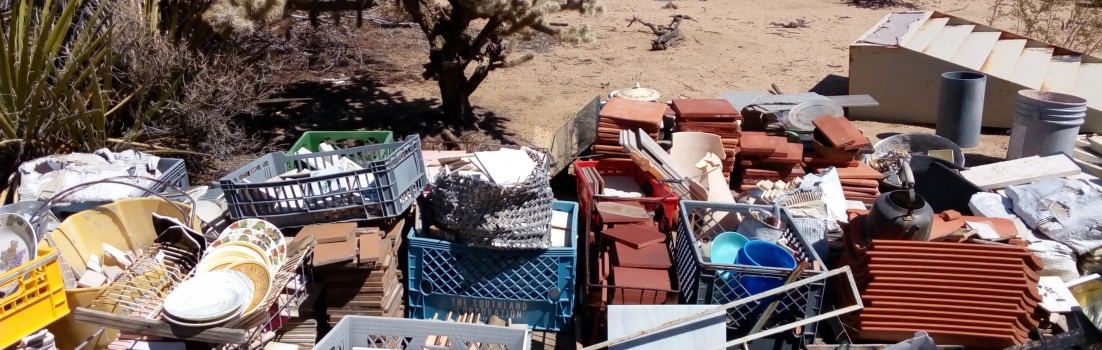
My niece just came by and picked up a few tiles to add to the mosaic coffee table she’s making. Look at just part of the collection she had to choose from.

Lots of choices of broken and used tiles and glassware to use for mosaics and tilework.

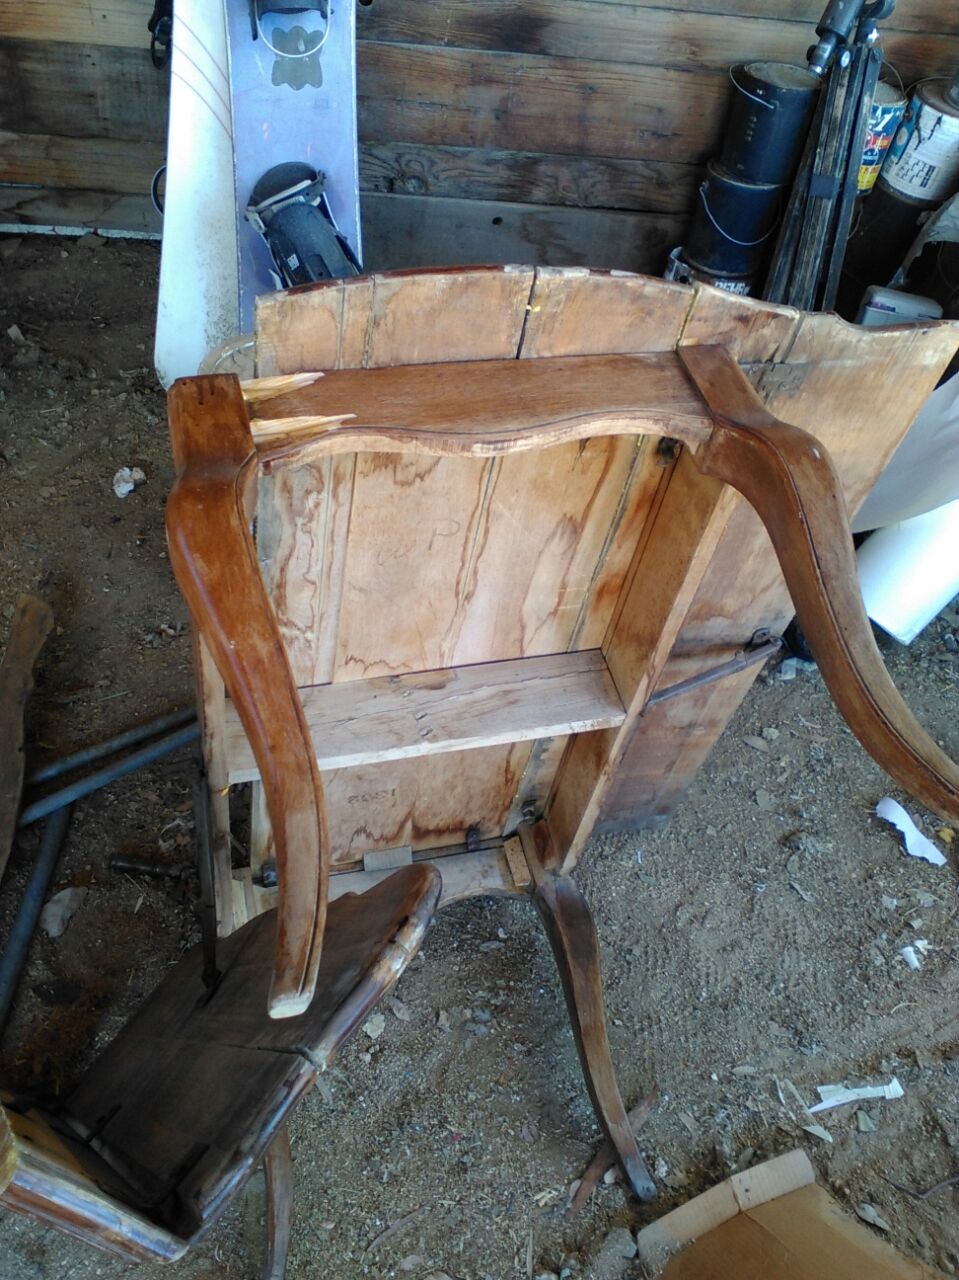
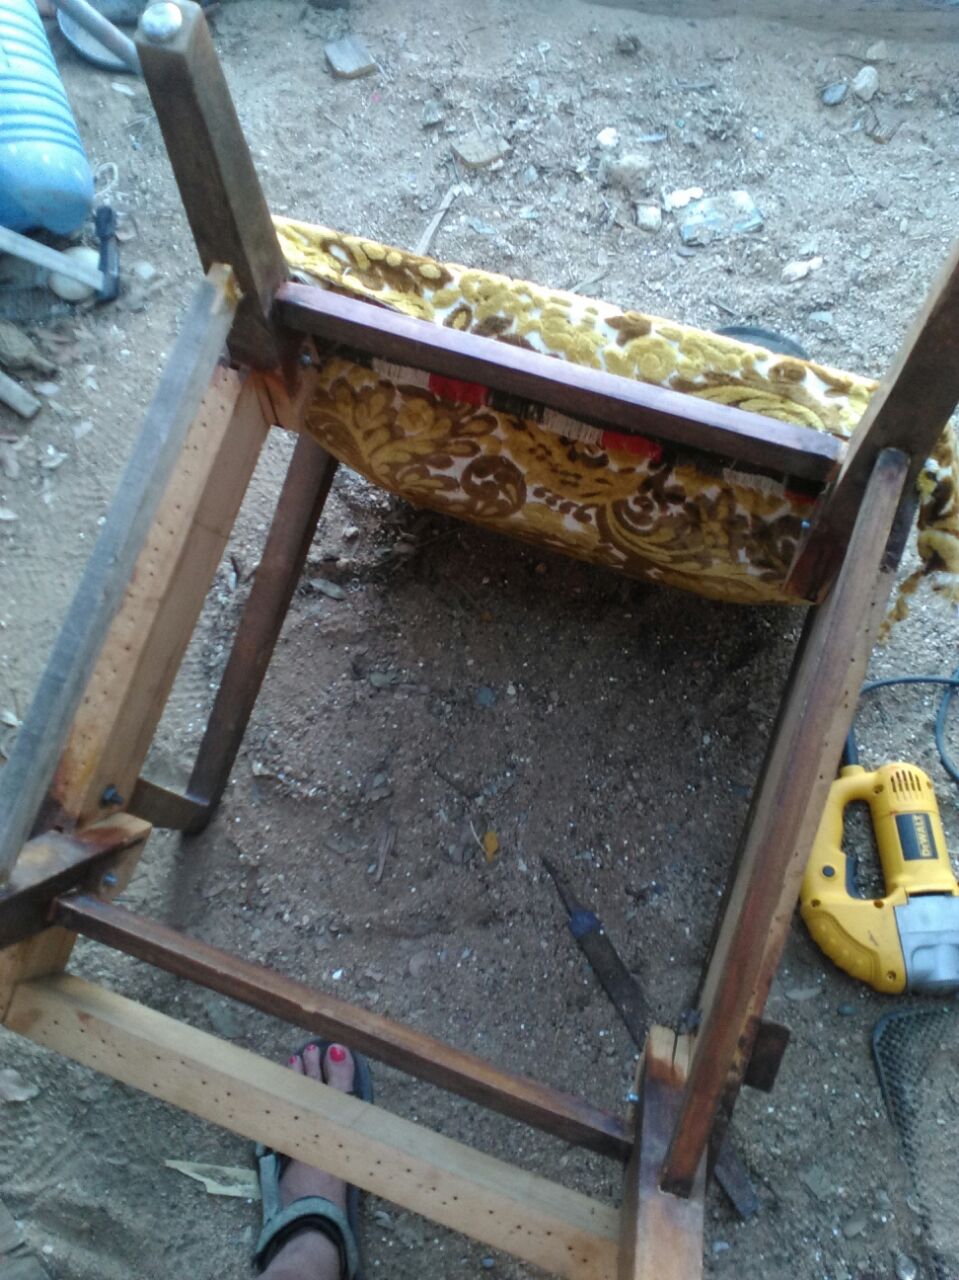
This week I tried my hand at my first ever upholstery job.

I took the chair apart and removed all the inner parts. Then my sister cut a plywood board, which was out of my range of expertise. Then I took exactly four times to put the wooden pieces back together with glue and screws. Unfortunately, my first two attempts included forgetting to put the plywood board in first. I persevered, and I called my sister for help when I really needed it.

The seat of the chair BEORE
This is what the seat looked like when I started.
I removed all the seat and decided to keep the same back.
We decided to put a plywood bottom on the seat instead of using webbing.

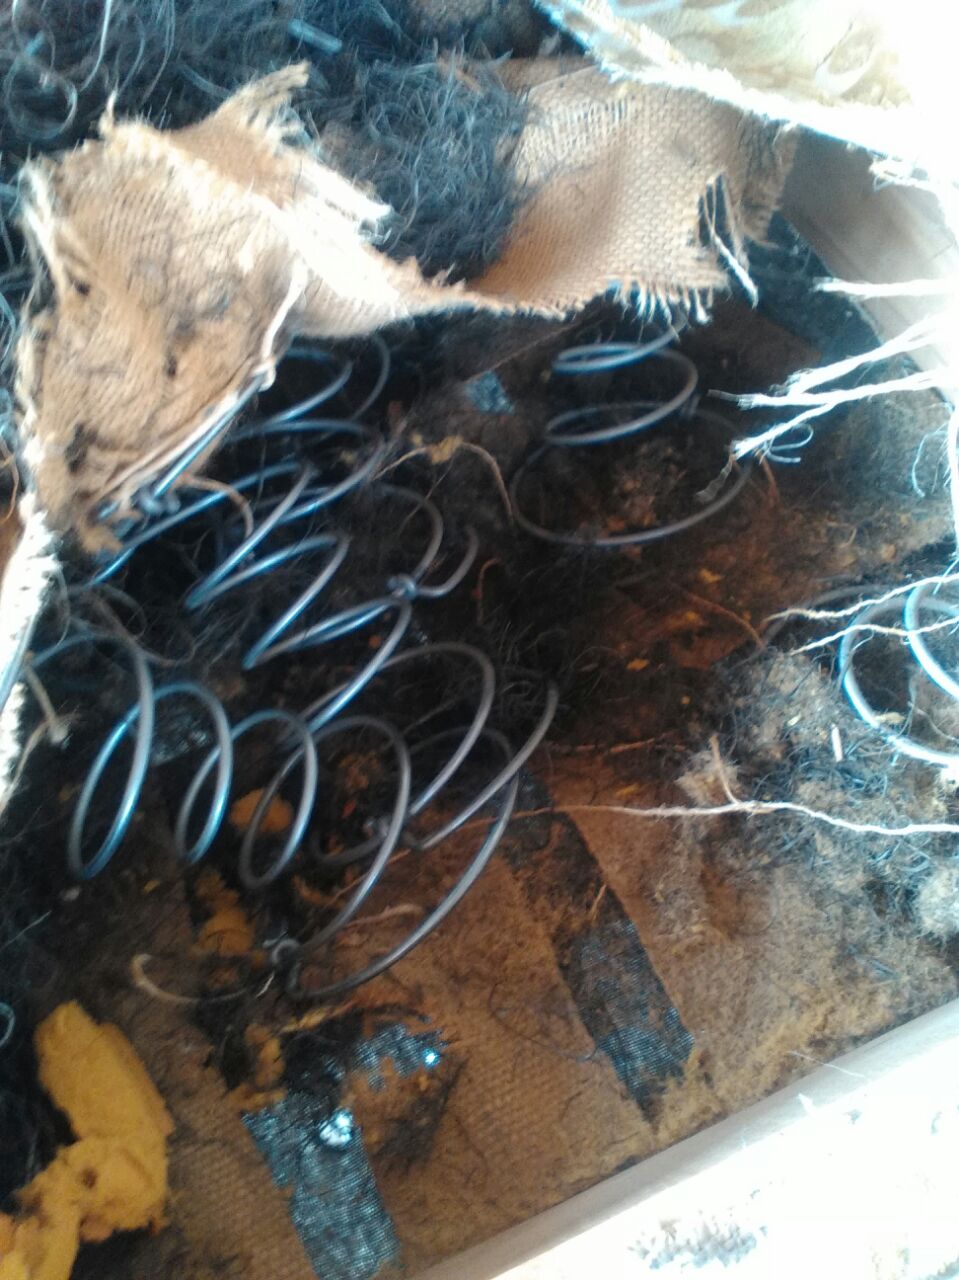
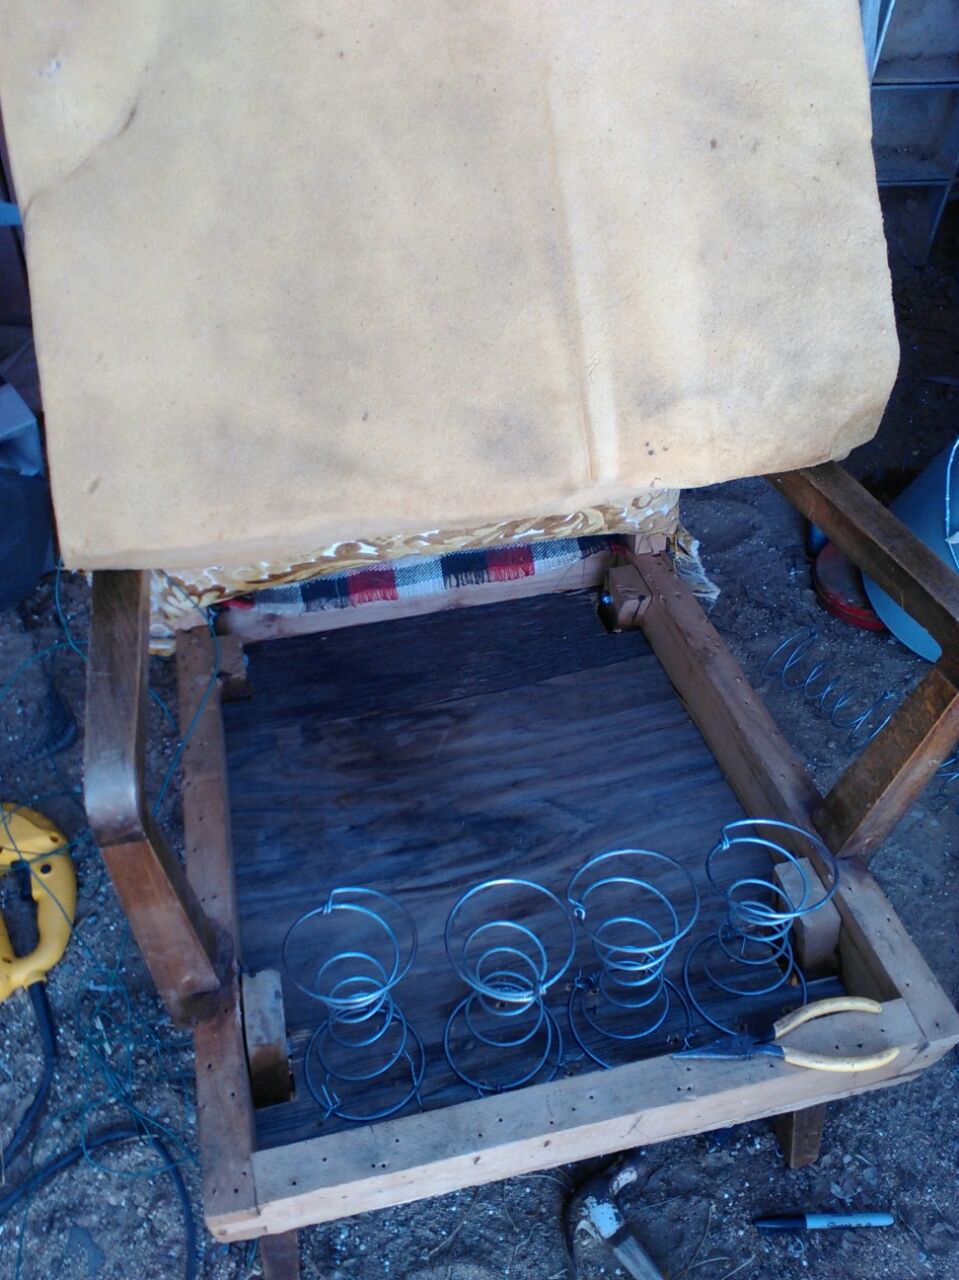
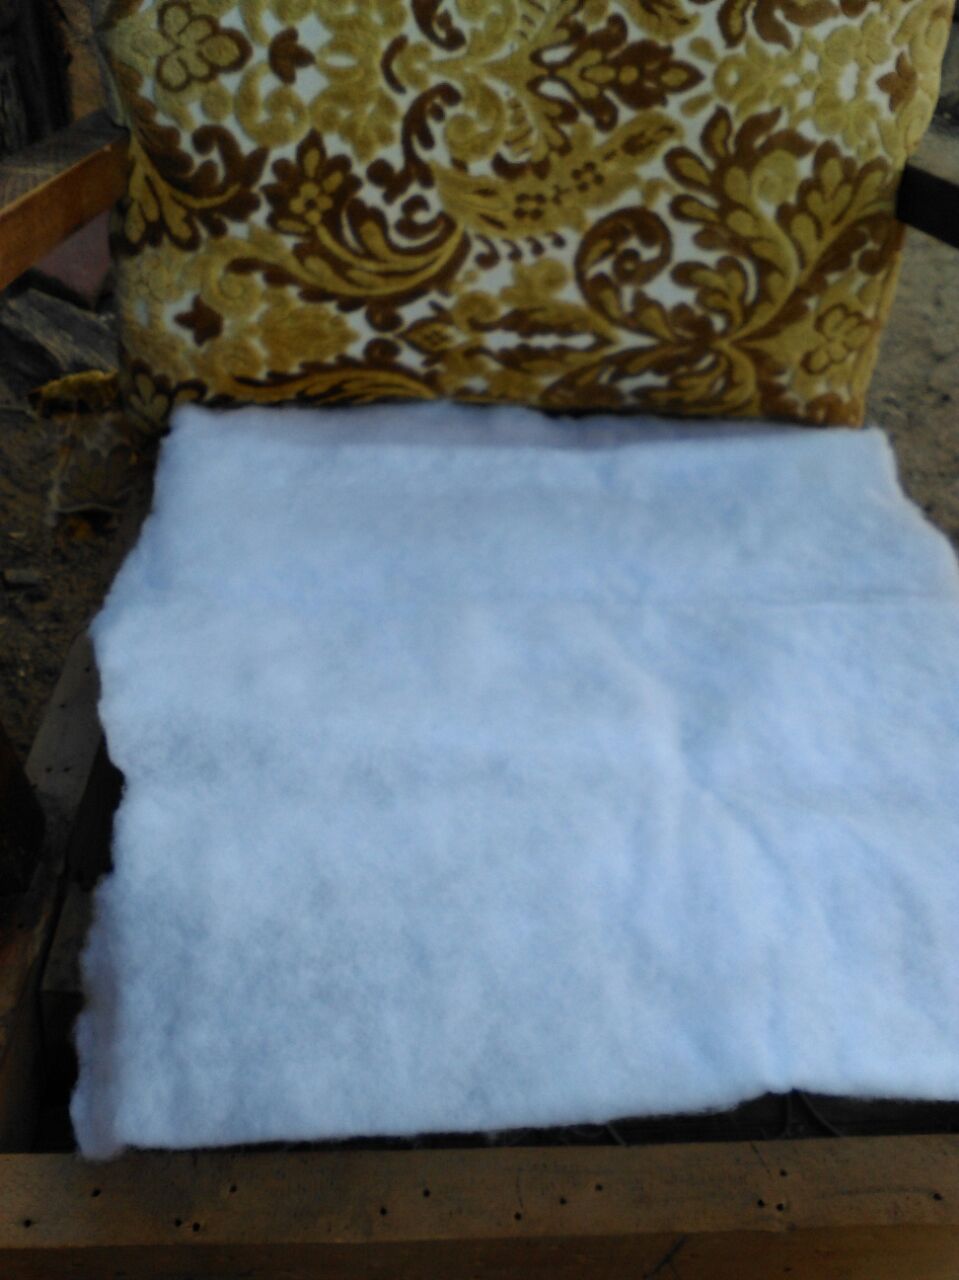
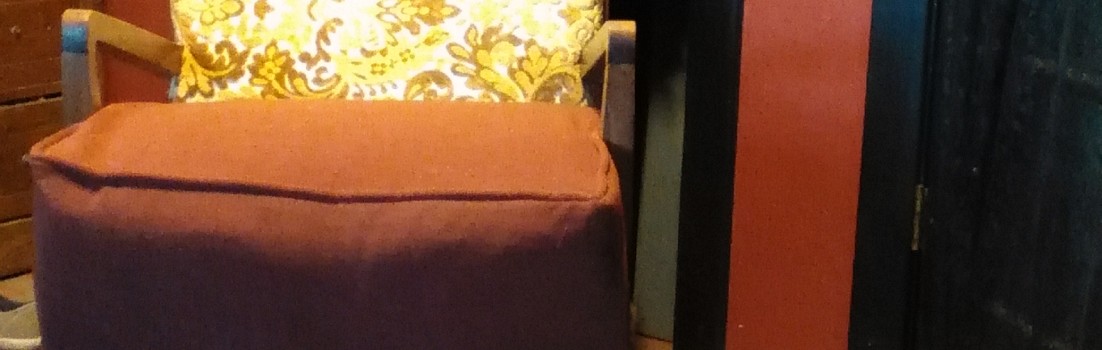
Next I drilled and twisted wires onto the plywood. I added a really big foam pad.  I sewed a cover. I tacked it down. And one of the best parts. I did it all with found materials at my sister’s amazing place! Many of the tasks I had to do were things I had little or no previous experience doing.

I wired all the springs down onto the plywood.
I added a big foam pad with a layer of quilt batting.

It turned out really ugly, but it is comfy and I did it.

I sewed the cover and tacked it on. Here's the finished chair.
I sewed the cover and tacked it on. Here’s the finished chair.

I practiced so many of the characteristics that I encourage my students to have in genius hour. Ambiguity, generating ideas, flexibility, adaptability, self-reflection, intrinsic motivation, risk taking, and perseverance. (From the Self-Assessment of Creativity Traits.) I can talk about these qualities, but when I live them, it’s so much more powerful.

Some takeaways:

  1. I really need to give myself more time for my own genius hour projects.
  2. I need to try new ventures, to practice skills I don’t yet have, to build and make, and to challenge my preconceived ideas of what I am skilled at.
  3. Sometimes it’s OK to call someone for help when I’ve exhausted my resources.
  4. When I used repurposed and found materials it became so much more meaningful and authentic to make something useful, while also protecting the environment.
  5. I need to practice and fail over and over to really learn the characteristics of creativity like perseverance and risk taking.

Now, my next job is putting this back together.

My next project is to glue this table back together.

What is the Purpose of School?

Recently Oliver Schinkten asked the question, What is the purpose of school? (Read more provocative questions at #QinEd)

My first thought was that was a very big question. I believe the purpose of school is to save our democracy. It’s a frightening thought to consider what America, and other countries, would be like without school. I believe in public education, even with all its problems that will be fixed. I believe our country needs school in order to save itself.

On a more down-to-earth level of school purpose, I liked the idea of communication Joy Kirr shared in this blog post when she answered Oliver’s question.

Certainly communication is the paramount goal of English language learner instruction. I am teaching in a bilingual school in the Kingdom of Bahrain; this year I’m moving up to second grade after 1.5 years in kindergarten. On a day-to-day basis, my goal is much like Joy’s, to use the English language in all its facets to communicate with my English language learners. In addition, I want them to grow in their ability to communicate in English, as well as their native Arabic.

I teach them about what research says about their growing brains when they are learning multiple languages. (Some of them actually speak three or four languages.) I teach them about how they get smarter when they have to struggle to learn something. (SIDEBAR: Join us on 6 August 2015 as we discuss more about using #mindset in the classroom.)

Of course, the reason for all of my teaching is a bigger life lesson.  My purpose is for them to be not only lifelong learners, but creative innovators, collaborators, and confident world-improvers.  What could be a better gift for today’s world than these bilingual innovators from Bahrain using what they’ve learned to make the world a better place? That’s my ultimate purpose in teaching English to second graders.

How to Add a Flickr Image URL to an Edublogs Post

One Carrot” image by Hada Litim on eltpics is licensed under CC BY-NC 2.0

I love using Flickr to post my own pictures. It’s a great resource for storing photos, up to a terabyte of image space for free. I also use others’ Creative Commons pictures, like the one above from eltpics.

Here is a presentation that will help you add Flickr images to your Edublogs website:

For those who know, is this the best way to do this in Edublogs? I know there are many other apps that automatically do the work of citing Creative Commons images in your blog posts.

If you have a favorite CC image resource, will you please share it in the comments below? Thank you!

More information:

Creative Commons – About Creative Commons Licenses, keeping the Internet creative, free, and open.

Flickr.com – Sign up for a free account.

What is Hotlinking? – Why You and Your Students Should Avoid It” – Free Technology for Teachers post by Richard Byrne (@rmbyrne), which suggests you NOT do what I do above because of some good reasons! Mostly I use my own images, but this post gave me some good things to think about before hotlinking to another’s image.

Thanks to Sue Waters (@suewaters) for tweeting me two additional resources for linking to your Flickr pictures.

  1. Embedding Flickr, YouTube, Tweets, Vimeo, and More – This is really easy on Edublogs. I don’t know why I forget about it. Click to learn a great feature of Edublogs.
  2. Sue also shared Compfight, one of those sights I slightly know about that adds the attribution. Here’s how you add it as a plug-in on Edublogs.

That reminded me of another favorite of mine–John Johnston’s Simple CC Flickr Search and the newer version.

#JJAProject – A Photo A Day in June, July, August

A summer memory from 2013

Summer is coming, and I believe it’s a perfect time to join a photo a day group.

Four years ago Sheri Edwards invited me to join in the 2011 inaugural summer of the #JJAProject–for June, July, August Project. It was started especially for busy teachers who might want to do a picture a day, but can’t commit during the school year. It sounded perfect, and I wholeheartedly jumped in that summer.

Mostly, it was a wonderful way to get to know members of my PLN. When people share their lives through photographs and stories, how can we not get to know them? It was a lovely experience, and I still appreciate the friendships that have developed.

In addition, a photo a day is a great way to archive memories. For instance, I just looked back at at this post from 2011, and I had warm memories of that summer when we painted Maria’s room RED and I went to an NEH Landmarks of American History summer workshop about Abraham Lincoln.

In 2013, I tried it again, and it was another great summer of photos, relationship building, and memory collecting.

I seem to be on a two-year track with #JJAProject, for now I’m ready to do it again this summer.

Would you like to join?

It’s easy! Here’s how you can participate:

  1. Take a picture a day starting June 1.
  2. Choose how you want to share it. Post it on Flickr in the #JJAProject group or share it on Instagram. Create a photo-a-day blog and write about it or simply attach it to a tweet on Twitter.
  3. Tag it and share it with the hashtag #JJAProject.
  4. One more important step is to leave comments on the photos of other participants, deepening friendships and connections with members in your PLN!